Instant Pot for Fermentation – Lessons Learned

I received this helpful info from London fermentation enthusiast Haidi Jenkin:

I thought you might be interested to share with your readers how the (seemingly ubiquitous) Instant Pot can be used for fermenting purposes. I have used mine for many different fermenting projects described in your books – for example:


Natto – you can cook your soy beans in the Instant Pot for 60 mins or so, drain then add Natto spores or wash out a pack of natto into the beans and use the Yoghurt normal setting to maintain the right temperature for 24h. 
 
Koji – to cook the rice the right way you can use a bamboo steamer in the base of the pot and a tea towel to elevate and wrap the rice during cooking – the bundle sits on the steamer out of the water which reduces how wet it gets. This is cooked on the Rice setting. Once cooled you add the koji spores, separate and wrap in two tea towels, and rest these bundles on top of the bamboo steamer keeping them off the water in the base of the Instant Pot (this water is needed for humidity so add some if it all got used up in the last step). You can then use the Yoghurt less setting and a tea-towel or bamboo lid on top of the pot, this maintains the right temperature, humidity and oxygenation for the first 24h. After this you can take the bundles out and leave them at room temperature since they will now need cooling vs heating.  
 
Amazake – the Keep Warm less function keeps the amazake mix (koji + rice + water) at just the right temperature for the 10h you need to develop the amazake.
 
Dosa batter – Yoghurt less is again good for this, probably this would suit many fermented batters such as injera particularly during the winter. 
 
Your readers might be interested in the Instant Pot temperature specs for these settings:
Yoghurt less – 30-34 degrees C / 86-93.2F
Yoghurt normal – 36-43 degrees C / 96.8-109.4 F
Keep warm – 63-78 degrees C / 145-172 F


A Slice of Bread as a Yogurt Starter?

Venezuelan fermentation enthusiast Neyda Fernández wanted to make yogurt but was having trouble finding a starter. So she decided to experiment with a method she had heard about, using a slice of bread as a starter.

Here is her write-up of the experiment and her results:

Making yogurt from a slice of bread

Question: Is it possible to make yogurt using a slice of bread with some milk as a starter culture?

Motivation: Allow people who live in countries – like my hometown, Venezuela – where it’s not easy to find ferments like natural unsweetened yogurt to make homemade yogurt using as a starter a slice of bread, an easy and common ingredient.

Hypothesis: There are enough lactic acid bacteria in bread to use it as a ferment to make yogurt. Probably they are not the same strains present in commercial yogurts but they will produce enough lactic acid from lactose to acidify the milk.

Procedure/Recipe: Put a piece of bread in a small bowl of milk for 24 hours to 48 hours, depending on the ambient temperature, then discard the bread and use the curdle as a starter culture. From this point I used the yogurt recipe from “Food Fermentation: The Science of Cooking with Microbes” course.

Control: Just milk
Variables: Milk and a slice of bread white bread (Wonder); Milk and a slice of baguette
Type of milk: Dairy
Measurement tool: pH strips

In each batch, the milk’s starting pH was 7. A starter was prepared by keeping the milk and bread (or without bread in control) at 28 degrees C (82.5 degrees F) for 24 hours; then yogurt was prepared with using that starter, incubated at 43 degrees C (110 degrees F) for 8 hours.

Control (milk only) starter, with a pH of 7, was not sour, and curdled slightly. The incubated yogurt it produced had a pH of 6. “Sweet like milk, sourness undetectable.”

Baguette starter was slightly sour, with a pH of 5, and curdled. The incubated yogurt was creamy, semi-solid, and slightly sour, with a pH of ~4. “Even though I liked it,
it was too sour.”

White Bread (Wonder) starter was also slightly sour, with a pH of 5, and curdled. The incubated yogurt was creamy, semi-solid, and slightly sour, with a pH of ~4. “This was my favorite,tastes close to commercial yogurts.”

Conclusion: The hypothesis is correct, there are enough lactic acid bacteria in a loaf of bread to use it as a starter culture to make homemade yogurt.

Update: Neyda writes “Great news! I did the backslopping method and it worked!!! I have made five batches so far and the texture is as good as the first one.”


Sandor UK Tour September 2019

Sandor is getting ready to travel to the UK for an intensive workshop tour. His schedule will be as follows:

Sept 14-15   Hawarden, Flintshire, Wales Good Life Experience Festival

Sept 16         London   College of Naturopathic Medicine

Sept 18         Welbeck, Nottinghamshire The School Of Artisan Food

Sept 19         London     The Store X

Sept 21         Abergavenny, Wales  Abergavenny Food Festival


Traditional Norwegian Farmhouse Brewing

Our friend Amund Polden Arnesen, a Norwegian beer-maker,  shared the following information about a traditional farmhouse beer known as Maltøl:
 
The Norwegian tradition for farmhouse brewing has survived particularly on the west coast and in the middle part of Norway. In Stjørdal they still malt their own barley in specially built traditional malting houses on the farms called “Såinnhus”. They use direct fire with alderwood to dry the malt. Some of them also use a juniper infusion, called Einelåg, made from juniper branches as brewing water.
 
Their traditional yeast is unfortunately gone so they use bakers yeast or yeast from the local lager brewery. In Hornindal, Voss, Sogn and Møre on the west coast of Norway though they still keep their farmhouse yeast which they call Kveik. How old some of these strains are and how many generations they go back we are not sure of. We are also unsure of their origins, only that they are not of modern and laboratory pedigree. These yeast are traditionally pitched at close to 40 C which sounds insane to a modern brewer, but produces some interesting flavours in the beer.  Beer made with one strain I had made an orange liqueur flavour that I have never gotten from any modern yeast strain.
 
Many of these brewers make raw beer (not boiled), with makes for a different malt flavour and mouth feel. If one looks at what these Norwegian farmers have been doing through generations it in respect to the modern way of producing food and beverage products most of it doesn´t make sense. But if one tries to think like a farmer would it suddenly makes perfect sense. Take the fermentation temperature as an example. What is the most exact temperature one can measure without a thermometer that is closest to a good fermentation temp? Body temperature of course, and there anthropological surveys made in the fifties where the farmers were asked at what temperature they added the Kveik. An answer that pops up quite frequently is “milk warm”, a reference a farmer would know like the back of his hand.
 
For more information, check out Amund’s full article.
 

A wreath used to store yeast

A juniper infusion


Aged Almond Cheese

This week, teaching in Buenos Aires, Argentina, I tasted the best, cheesiest vegan cheese I have ever encountered. It was made by one of the students in my workshop, Nico Salguero. He generously explained his process to me in some detail.


Soak almonds in water for about 24 hours.

Remove skins.

Sprout the soaked almonds for about 2 days, rinsing periodically to keep them moist, but draining so they have access to air.

Grind almonds with fermented coconut milk yogurt or kefir, just enough to grind it into a thick paste. As an alternative he suggests rejuvelac of alfalfa.

Ferment for 24 hours at about 25°C/77°F.

Form into desired shape.

Dehydrate for about four days at a low temperature, about 20°C/68°F. The idea is to form a dry crust so it is easy to handle for the next steps, while the cheese retains moisture inside so fermentation can continue.

Submerge cheese in seawater or brine. Beginning on the fourth day of dehydration, and continuing for three days longer, submerge the cheese in brine three times each day. This is exactly how many aged dairy cheeses are salted. If you’re mixing a brine. mix it at about 5%, or 50 grams of salt for a liter of water.

After the salting, dehydrate about 5 more days at a low temperature, about 10°C/50°F. If you don’t have a dehydrator that can do this, the refrigerator will work.

Age cheese for 3-6 months at cool ambient temperatures.

According to Nico, it is possible to make this as a blue cheese by using a pin to insert blue cheese molds into the interior of the cheese after the initial dehydration.

Rather than addressing questions to me, please direct them to Nico: nicolasrsalguero[at]gmail.com. [Note: Spanish is his native language and his English is limited]


People’s Republic of Fermentation

I traveled to China in November-December 2016 in order to learn about fermentation practices there. I travelled there with my friend Mara King, her mother Judy, and another friend, Mattia Sacco Botto, who documented our travels on video. They all speak Mandarin and English, and share my fermentation and broader food interests. These eight videos, made by Mattia Sacco Botto, document some of what we saw and learned on our journey.


Sandor on the BBC

http://www.bbc.co.uk/programmes/b08xxfz5

Sandor Katz has been enchanted by fermentation, the mysterious process by which microbes transform food and drink, for some two decades. Since making his first crock of sauerkraut, his fascination withfermentation has broadened, deepened, and he now travels the world giving workshops. Based in Tennessee, his books including ‘Wild Fermentation’ and the encyclopaedic ‘The Art of Fermentation’ have helped many thousands of people to get started with making their own ferments, experimenting with flavours, fruits, vegetables, spices… and microorganisms.

Dan Saladino travels to Sandor’s forest home in rural Tennessee to meet Sandor, hear his story, and discover for himself the transformative, delicious potential of these mostly simple culinary processes.

Coming up in a future edition of The Food Programme, a practical masterclass in fermentation with Sandor Katz.


Bodai Moto-Zukuri Saké

Bodai Moto-Zukuri Saké

In December I visited the Terada Honke Brewery (http://www.teradahonke.co.jp/english.htm) in Chiba Prefecture in Japan, where they make incredibly delicious 100% wild fermented saké using very traditional methods and no pure strain starters. I spent a day observing, tasting, and talking with brewmaster Masaru Terada, the 24th generation brewmaster there. (See photos of my visit there at https://www.instagram.com/sandorkraut/)

Masaru-san described to me a simple ancient method of making saké, which he called Bodai-Moto-Zukuri that sounded so simple I had to try it as soon as I got home. I’m very pleased with the results!

Saké brewed at home in two weeks without any special equipment. In a bottle from Terada Honke Brewery, where i was told about this method, Bodai Moto-Zukuri.

Saké brewed at home in two weeks without any special equipment. In a bottle from Terada Honke Brewery, where i was told about this method, Bodai Moto-Zukuri.

The only ingredients are rice and water. I used 1.5 kg/3 lbs of rice altogether to make about 3 liters/quarts of saké. Some of the rice is in the form of koji, molded rice; see Art of Fermentation for info on making koji, or buy it.

The whole process took about 2 weeks.

The only equipment you need is a vessel with a capacity of at least 6 liters/1.5 gallons, and two cloth or mesh bags with mesh fine enough to hold rice.

Steam 500 g/1 lb rice.

Fill mesh bags: Transfer the steamed rice to a mesh bag, and place 500 g raw rice in the other bag.

Submerge: Fill vessel with 2 liters dechlorinated water and submerge the two bags of rice. The cooked rice will decompose into the water, providing nutrients for the yeast and bacteria on the raw rice.

Gently massage bag of cooked rice for a few minutes each day.

Taste after a few days. It’s time for the next step when it’s bubbly and starts to taste a little sour. For me this took four days.

Remove bags of rice from the water, and retain liquid that drains from them.

Steam the soaked raw rice.

Cool until still warm but comfortable to the touch.

Mix warm rice with 500g/1 lb koji, as well as the original cooked rice that has been soaking. Mix the three different forms of rice together thoroughly.

Return rice to water in vessel.

Stir daily.

Ferment 10 days to 2 weeks, tasting periodically.

Strain.

Enjoy!


German Fermented Gingerbread Cookies

From a German reader, Peter Schottler (email info [at] kulturata.de):

Fermented Gingerbread

Traditional German Christmas Cookies used to be made with fermented Lager Dough which was prepared around August and left to ferment until baking time in November / December.

This is a mostly forgotten art. This is very simple to make, with delicious results: Cookies with a very subtle, fine texture.

In August/September/October you prepare the basic dough without any spices/ dried fruit/nuts/leavening, which are all added later, when you bake the fermented gingerbread.

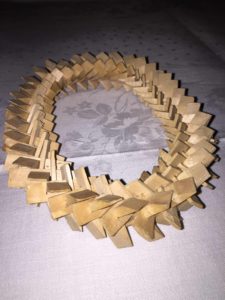
Traditionally, this kind of luxurious gingerbread cookie is baked on wafers. I use round wafers with a diameter of 70mm and I baked 530 gingerbread “Ellisen-Lebkuchen” this year – as they make a Christmas present you can’t easily buy, with an exquisite taste.

As I assume you want to start with a small quantity the first time, I’ll give you a small recipe.

For the Lager dough you need:

1 kg of organic blossom honey
1 kg of treacle (dark sugar syrup from beetroots)
2 kg of organic flour (I use spelt flour of a type between wholemeal and white)

That is all, if you want to rely on wild fermentation, which is the ‘old way’ to do it – that is to rely on the fungi, yeasts and bacteria from the organic flour and the organic blossom honey and to a lesser extent of the beetroot-syrup“ (Zuckerrübensirup) I use.

You take a large stainless steel pot with a lid, slowly warm the honey and the treacle to up to 37°C/99°F to make it easier to stir/knead in the flour. (This being the temperature in a bee hive, in the human body, and a temperature lactic acid bacteria like best – well, the ones I have spoken to…)

Once you have mixed the three components to form a dough, you put the lid on the pot and leave it to ferment in a cool spot for a few months.

Once November or December have come, you might want to bake your gingerbread cookies.

I take a portion from the dough, put it in a large baking bowl and place the bowl on a water filled pot on my stove for a few hours to get slightly warm so that I can knead in the things I want to knead in.

These will be:
− a pinch of salt
− 2 or 3 or… tablespoons full of „gingerbread spice“
− candied lemon and orange peel
− candied fruit (ginger, cherries, dates…) all cut into small pieces
− ground or chopped almonds, cashew nuts, walnuts etc.
− chopped dark or milk chocolate
− maple syrup
− ground cardamom, cinnamon, pepper, cloves, a little nutmeg, allspice, coriander, ginger (if you cannot buy “mixed gingerbread spice”), ground (organic) vanilla

Once you have mixed your dough with these goodies the next step is to add 2 leavenings. In Germany we use 2 tablespoons of “Hirschhornsalz” (hartshornsalt, ammonium carbonate) dissolved in a little lukewarm milk, stir that into the dough, followed by 2 teaspoons of potash (potassium carbonate), also dissolved in lukewarm milk and stirred in. If these are not available, use 2 tablespoons of baking powder and 2 teaspoons of baking soda.

Add a little more water or – more likely – some organic flour to get the dough to a consistency that enables you to form little balls of dough with a teaspoon and your hand which you then put on a wafer on a baking tray and press it to form a pancake shape. The cookie will rise a bit perhaps by 100% in height and a bit less in width. You’ll find out the right amount of dough for each wafer soon. About the amount of the size of a walnut?

Bake at 180°C/350°F on the lowest shelf for 15 to 18 minutes. Don’t bake your gingerbread too dark – just nice and brown. Cool on a rack with good air circulation.

Then, the next day, you can proceed if you wish and add the icing / chocolate coating.

My favourite is a gingercake with lots of candied orange and lemon peel, candied ginger, walnuts, sliced dates, cashewnuts, chopped chocolate, covered in a chocolate coating of molten chocolate which we call “couverture” with a French word.

But I also like this icing:

250 grams/1/2 pound powdered suger
1 or 2 tablespoons of organic lemon juice
4 or 5 tablespoons of raspberry (or other red) juice
2 handfuls of dried red rose petals

In a mixing bowl mix the lemon juice, raspberry juice and dried red rose petals.
Use an immersion blender to cut the petals into very fine pieces in the juice, which can take about 3 to 4 minutes.
Add the powdered sugar until you get a thick icing which you can use to “paint” your cookies. The raspberry juice makes the mixture a pastel pink, in which the darker red rose petal pieces give you nice red dots – and the lemon juice the much needed zing.

Kept in airtight containers (metal boxes, jars…) the gingerbread cookies would keep until Easter. ; – )

If they should get a bit hard, put half a small fresh apple into the container, which will give them some moisture back.